Showing posts with label What I'm Buying Up. Show all posts

Tuesday, November 10, 2015

Product Alert

Short Rib Ravioli
Star Ravioli, Moonachie, NJ 


         Hello my friends.....I'm back from my baby duties for a bit.....aka- girls are napping so I have to make this super quick....
        As you know, at least I hope you know, this gal loves ravioli. I really think they are the bomb diggity. I have yet to find one I am able to pass up. (seriously, try me) My favorite actually come from  a long time best friend's restaurant, Capone's in Toms River. But since I don't live around the corner from there nor work there anymore, I hardly get to feast on them. So I have ventured out to find some new ones to satisfy my ravioli-ravenousness.
      Enter these pockets of bliss.....found at Dearborn Market in Holmdel. I'm sure they have them elsewhere but this is where I found them. In fact, Star Ravioli has a ridiculous amount of varieties to choose from. Go to their site and take a look.....contain yourself though, it is pretty overwhelming. Anyway, back to these yummies. Short Rib filled to be exact. They were so delicious, a dozen in that box was truly not enough. The filling was all short rib, nada else. Here is how I prepared them:

1. Boiled water and got that ready for ravs
2. Melted about 3 TBS unsalted butter in large skillet  and added salt, pepper and dried parsley
3. Quickly used a vegetable peeler to make shreds of carrot and added them to saute. About 2-3 carrots. Let cook for about 5-7 minutes.
4. Meanwhile, boiled ravioli and added to sauce when ready
5. Mixed it around a bit and served with some freshly grated parmesan cheese.
Mangia!


Thursday, August 28, 2014

Fleischmann's Homemade Pretzels


Fleischmann’s Simply Homemade Baking Mix:

Pretzel Creations

            Wow, it has been quite some time since I’ve added to my “What I’m buying Up” section. Not exactly sure what that means.....We all know this gal likes to shop so it can’t be the lack of that….I’m always scouring the food store well after my list has been  all checked off and completed……I’ve got a pretty big mouth so I can’t imagine it being me wanting to keep something on the DL…..

            Well than, I guess it boils down to not enough time to blog about my everyday cooking, trying different places to eat, and buying new products to share. Waahhhh, wahhhh, waahhh, where does the time go???

            Enter- my decent summer tan, a few books read and conquered, and plenty of sand to clean out of my trunkJ    Needless to say, it has been a great summer but one in which you might have missed me.

            So even though I can’t promise a more week-to-week posting schedule, I can bring you a new product that Hubby and I are just smitten with.

            I actually can’t take credit for this find. Matt came along shopping with me and spotted this product perched high above the baking goods. I think the marketing team did a swell job on this as the picture on the box definitely caught his eyes in oh, about 2 seconds. He’s a sucker for soft pretzels so once he saw the glistening twists displayed, he presented them to me with that cute smile.

            He gets me every time.

            So long behold, we bought them, made them and are definitely going to be buying more. They have a great buttery taste and are quite crisp right from the oven.  The process isn’t exactly 1-2-3, but if you can manage to give yourself 20 minutes, you will be well on your way to snack Heaven. Enjoy…


To read more about the product as well as other items, click here

Thursday, December 12, 2013

Apricot-Mango & Chipotle BBQ Chicken & Gift Ideas...


           I know, I know…..Gina, what the bejingle are you thinking?!? Grilling in December, grilling the week of 2 snowstorms, and grilling when the last thing I want to do is step outside? I hear you, believe me. As most of you know, I’m the type that is cold in July with chilly fingertips all year through…..so yes, I know this is a silly post.

            But give me one minute of your time (maybe 10 actually) and listen. What I’m really getting at here are gift ideas. Ya know, the tree needs presents in a few weeks and I’m sure there are few people you still have zilch for. For you and for them, here is where you need to go to get them something unique, inexpensive and delicious……HomeGoods or Marshalls. No, not for their cute candles or name-brand sweaters- we all know to get that stuff at the aforementioned spots. But where you can get some nifty presents is way beyond the clothing racks and scented stations….it is in the cooking and baking departments.

            Here is what you do….grab a wicker basket from the "storage" aisle (they usually have a gazillion, poor trees). Head down the cooking aisle with the salsas, jellies, salts, etc. Pick a theme. For example, go Mediterranean and get some imported oil, spices and maybe a nice bag of pasta or couscous. Then, throw a wooden spoon in there and viola- dinner in a box and a perfect present for me. Or maybe, for someone who likes to grill, get them a jar of what I used in this post- a few specialty BBQ sauces, a meat thermometer, and an over-sized spatula. (FYI-best BBQ sauce we've found there is Kozlowski Farms)Or one more idea I’ve done, for the bake-aholic, is filling that basket up with a few flavored sugars, vanilla beans (best place to get them is at HG or Marshalls- best price you’ll find), a whisk and a few mini cake molds.

             So there, great gifts for those who you still can’t seem to pick out the right thing. Of course, they are food-themed but c’mon friends- for one, this is a food blog and for two- I think giving the gift of a quality home-cooked meal is better than anything you could find in a store. Enjoy…
 
 
Apricot-Mango & Chipotle BBQ Chicken
Serves: 2-3
 
OBJ: TCW be able to spice and sweeten up ordinary chicken

Ingredients:
½ C Apricot Mango & Roasted Chipotle Grilling and Dipping Sauce(I used Kozlowski Farms, but any BBQ sauce you like would work)
2-3 large boneless, skinless chicken breast
1 TBS olive oil
S & P: salt and pepper

Procedures:
1. Preheat entire grill on medium-high flame
2. Brush both sides of chicken with oil, then sprinkle decently with S & P
3. Add chicken to hot grill over direct high heat, cook for 5 minutes. Flip, then cook over direct heat for another 5 minutes
4. Place chicken on other side of grill and turn off the flame beneath it. BUT leave the other side on high flame!
5. Use brush to glaze chicken one side at a time. Cook chicken for remaining time on indirect heat- 5 minutes one side, then flip, glaze and cook other side for 5 minutes
6.  Quickly flip once more to caramelize the side you just glazed

** total cooking time should be about 20 minutes, but if you have larger chicken pieces, it may be 6-7 minutes per side (28 minutes total). Always check chicken for doneness- completely white meat, clear juices, and 165 on a meat thermometer**

Thursday, November 14, 2013

A New Cheese on the Block


Introducing…..Mielito
            So how many cheeses can you name? Mozz, Cheddar, Feta, Gruyere, Parmesan, Gorgonzola, Ricotta, and I’d say I could do about 5-10 more, but I think that would be it for me. I’m not speaking for all, but I think you’re in the same boat as me. You know your ordinaries, you know your loves, you know your boundaries and I’m sure you know your “no-way Jose” cheeses.

            And well, besides the basic cheeses, I rarely consume anything else. I find this kind of sad since the amount of choices out there in Curdland are endless. Take one walk around the “cheese island” at Wegmans  or stop by your local Italian Market- the varieties will amaze you. That being said, I think we should all resolve this year to try some new cheeses. I know it is only November, but why not kick start 2014 a bit early? I’m not asking you to begin training for a triathlon or give up white flour, I’m telling you to increase your cheese repertoire. I’m in, are you?

            And since I’m the driver of this cheese bandwagon, I have one cheese in mind that you should go out and get. Mielito, that is. Hubby bought this a few weeks back to add to our dinner salads. We are always trying to step up our salad game, but that is another blog post. Anyway, we figured it would be hearty enough to bulk up the greens while salty enough to season them. Well, we got hearty and salty-yes, but we also got creamy and nutty. Needless to say, the cheese was great. I did some googling research and I found out that the cheese is from the Veneto region of Italy and is made from cow’s milk that has a bit of honey added in. Doesn't that make you feel smarter?!?

            So there you have it, a new cheese that we tried and now you have to. Don’t stress about getting it on a salad though, I’d save that for another day- just get the goods, grab some crackers, and keep that treadmill all folded up! Enjoy...


Mixed Greens over Sliced Pears, Roasted Walnuts and Mielito
Serves: 2

OBJ: TCW be able to try a new cheese

Ingredients:
10 thin slices of Mielito Cheese
2 C romaine lettuce, cleaned
2 C baby spinach, cleaned
¼ C roasted walnuts
1 Bartlett pear, sliced
¼ C Craisins
½ croutons
½ C cherry tomatoes, cleaned and halved
¼ C shredded or chopped carrots
S & P- salt and pepper
Honey Balsamic dressing- I recommend Ken’s Reserve

Procedures:
1. Divide the ingredients up into 2 bowls
2. Salt and pepper to taste
3. Add dressing to the amount you prefer


Thursday, November 7, 2013

Sweet & Salty Bananas


          Oh, overripe bananas, how you bother me so……you attract yucky flies, stink up my cabinet and sometimes get caught in my bag and make mush! Your only reprieve is that you make a delicious base for both breads and muffins and from time-to-time you make my oatmeal extra hearty and satisfying on a cold morning. But even with those little treasures, I still can only handle so much of your bread, muffins and oatmeal.

            Luckily, I’m pretty imaginative and have quite the chocolate-packed pantry so that you, my bruised buddies, will not find yourself in the trash. Oh no, I am going to portion you off, dip you in dark chocolate, roll you in salted peanuts, then freeze you for our next nighttime treat. Okay, that might not sound as appealing to you as it does to me, but oh well, I’m the cook- I win….

            Okay, enough with the banana-talk or should I say enough monkeying around! Hahaha…..oiy vey, I know I know- I’m a bit odd. I do try to contain myself with my quirky humor but sometimes I just go with it. Which is kind of like this recipe- I had no idea what it would turn out like but knew I just had to let it fly. And whattya know, it was a keeper……just like me! J Enjoy…


Sweet & Salty Bananas
Serves: 6-8

OBJ: TCW be able to use up her ripe bananas without using them in another darn banana bread or muffin!


Ingredients:
3 overripe bananas, peeled and cut into thirds or about 3 inch pieces
1 C dark chocolate melting wafers, melted according to package directions ( I rec. Ghirardelli brand)
¾ C crushed salted peanuts, placed in a shallow bowl or plate
1 empty ice cube tray
6-8 tooth picks

Procedures:
1. Working with one banana piece at a time, stick it with a tooth pick ½ - ¾ way through. Roll or dip in melting chocolate, drip off excess. Roll in salted peanuts. Place toothpick side up in ice cube tray
2. Continue process with remaining ingredients
3. Freeze for at least 2-3 hours
4. Enjoy  

Thursday, August 8, 2013

Wave Bar Greek Yogurt Parfait


           A little late on this post, I know. Hubby and I just got back from a family trip out to Lake George. Much fun up in those parts, especially the hiking and grilling! Can’t say I found any 4 star dining experiences but I’m one who believes that when the company is good, the food is that much betterJ So with that, the eats were exceptional!

            Back to the blog….I recently was grateful to receive a few samples of Wave Bars- all natural, soft-baked granola bars that are packed with “deliciously disguised veggies’. I was given their 2 favors: Mixed Berry and Baked Apple.

            I tried the Baked Apple first and I was decently impressed with the favor. I was hoping for a bit more sweetness but was won over by the hearty consistency. I ate that one on-the- go all by itself. My next experience with this product was the one I am bringing to you today…..

            You want more bang for your buck, right? Well I don’t think many of you don’t, so here is a quick lunch for you or a snack for your growing kiddos that will knock your noggins off with nutrition. Being that I wanted the bar to have more sweetness to it, I thought of combining it with ripe summer fruit and some protein-packed yogurt. I am a sucker for anything with granola and yogurt so I knew this was going to be killer.

            Since the bars have a ½ serving of veggies in each one (they contain carrots, pumpkin, beets, broccoli, and kale!) and Omega 3 healthy fat, the Greek yogurt has mucho protein and the fruit has both fiber and natural sugars, you are getting a wallop of a deal in this not-so-average parfait. When I did the calorie break down, it was 170 for the bar, 130 for the yogurt and around 50 for the fruit- that’s 350 well-rounded cals if you ask me. For an adult, that would be a great lunch in a pinch or for youngsters, a winning breakfast or after school snack.

            So if you are looking for either a great and tasty way to eat more greens yourself or just on the prowl for sneaky ways to get some veggies into your children, I think these bars are your answer. As for me, I’ll def. be storing these parfaits in my mini-fridge at work for lunches in a bind. As for you, a challenge: try to find other tasty and quick ways to get 5 different vegetables either in your system or your kiddies at one time!

            Here’s to riding the wave my friends! Enjoy…

For more information including  where to buy the products, please visit www.wavebars.com Like them on Facebook: facebook.com/wavebars

Wave Bar Greek Yogurt Parfait
Serves- 1

OBJ: TCW be able to include almost every food group into a snack-on-the-run

Ingredients:
1 Wave Bar- I prefer Mixed Berry flavor
1 6 ounce container vanilla Greek yogurt, I recommend Dannon Oikos ®
½ C mixed fruit

Procedures:
1. Use a butter knife or your fingers to crumble Wave Bar
2. Fill the bottom of a small Tupperware container with yogurt (or a small bowl if eating at home)
3. Top yogurt with crumbed Bar
4. Top with fruit
5. Seal and pack in cooler with ice pack (or if using bowl- eat up or wrap in plastic wrap for later treat)


Thursday, May 23, 2013

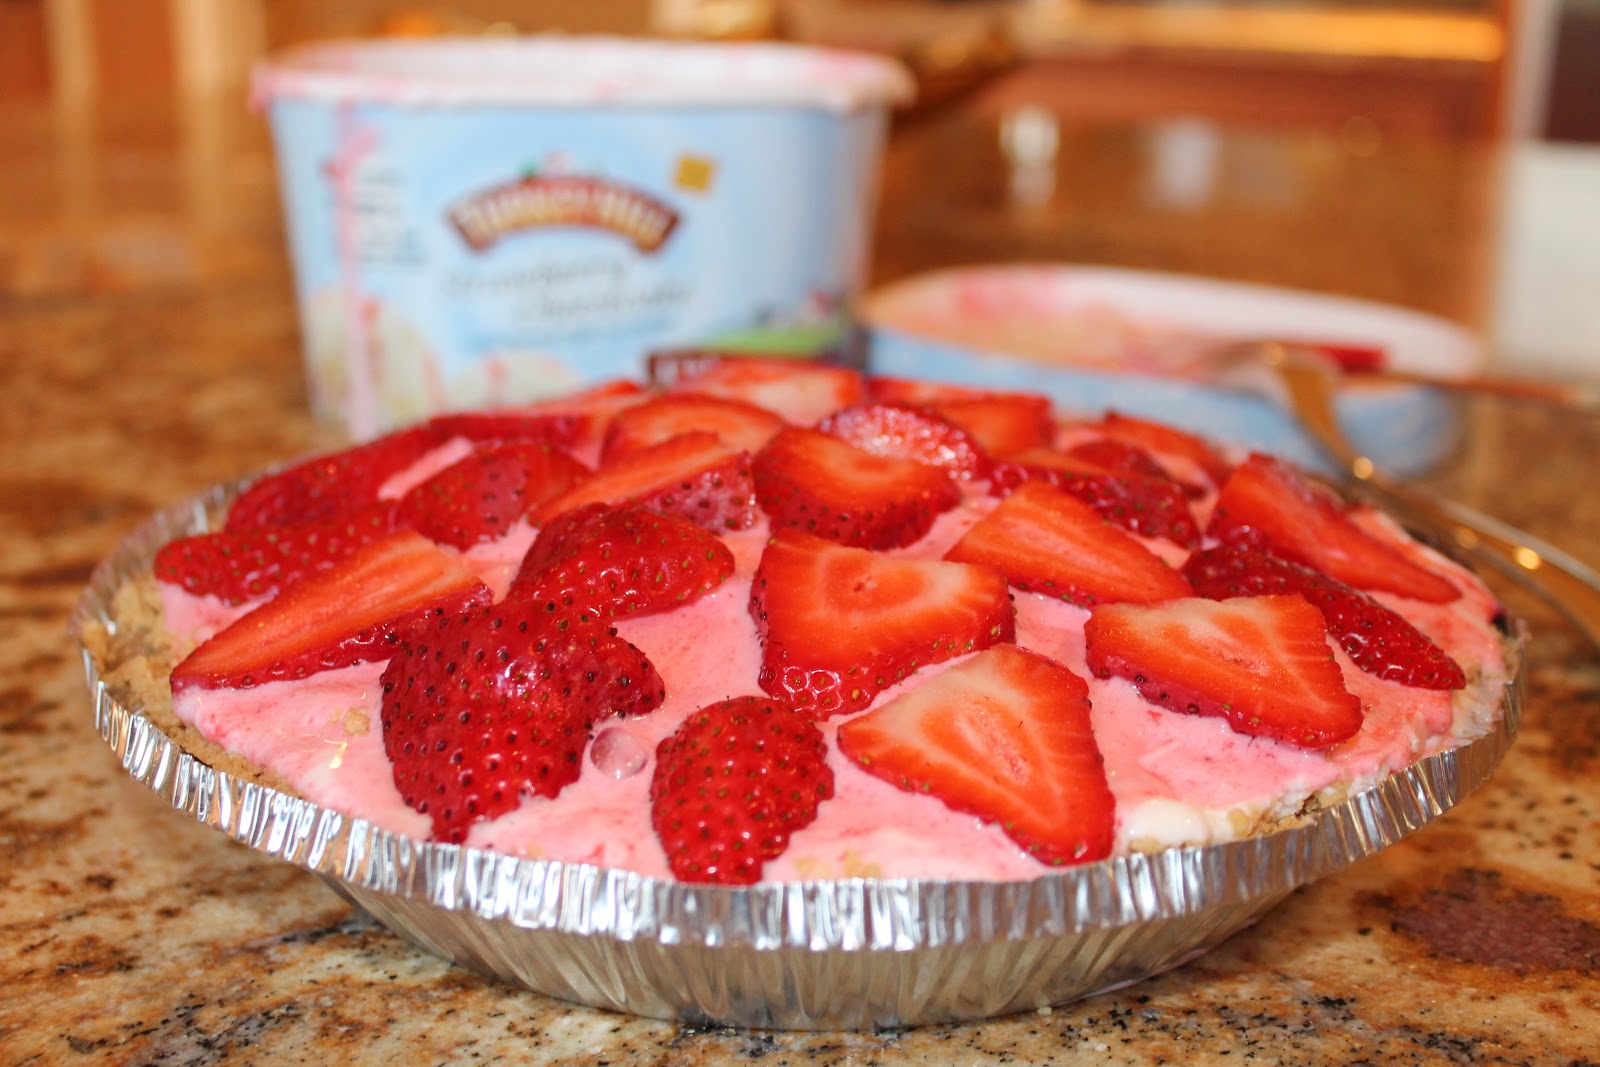
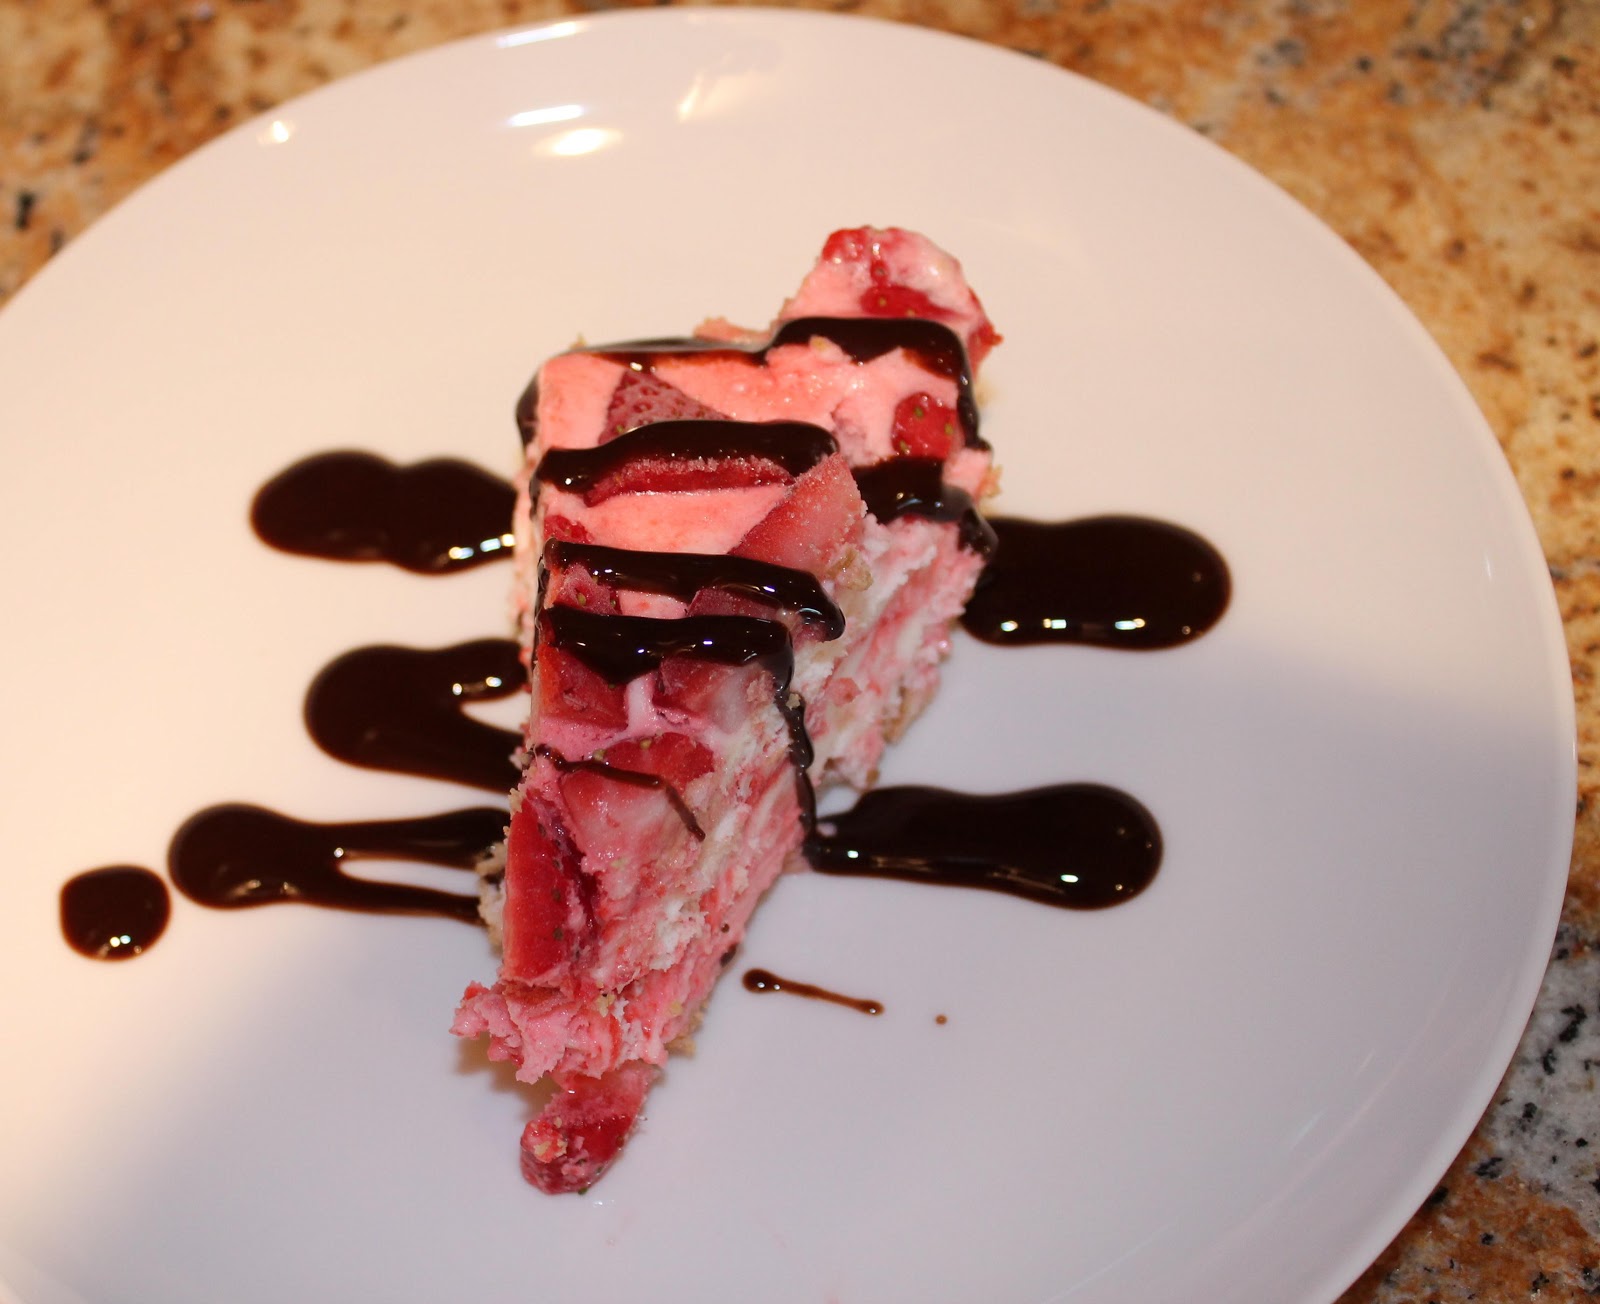
Frozen Strawberry Cheesecake Pie


           As a teacher, it’s obvious that I’m against cheating.  No looking at others’ papers, no copying homework before class has started and no peeking at the test beforehand. Simple rules I’m sure you all are familiar with and have broken. No need to confess, I am human too, I get it.

            But while I maintain a strict no-cheat policy in my classroom, I wholeheartedly promote a cheat-any-way-you-can attitude in the kitchen. With time schedules like that of politicians, we all know that any chance to buy some time is a precious opportunity. And for the people who make products who help us find these opportunities, I would like to give you a big SMOOCH! Or a hug, maybe a wink, just something to show how flippin’ happy you make me.

            With that said, this here recipe calls for some serious affection. For one, the crust…Granola crust, how neat, right? Neat to eat that is, not neat to find, grind, bake and cool. Then, the ice cream….I know, no one really makes their own these days but seriously, I don’t blame them. The stuff available today is just a thing of beauty. Especially in this recipe, can you imagine making cheesecake, then making ice cream, then combining? Puh-lease, there's a better chance I'd boycott dessert if that were the case! Sadly though, I actually do own an ice cream maker……Hubby bought it for me when we were just dating…..sweet gift from him, poor follow through on me. Eh, I’ll dig it out someday I promise…..Luckily though, I don’t and you don’t need one of those contraptions for this pie. All you need is about 10 minutes and some overnight freezer-time, good deal, yes? So go ahead my friends, cheat and cheat proudly! Enjoy…


Frozen Strawberry Pie

Serves: 8

OBJ: TCW be able to make her first summer dessert of 2013

Ingredients:
1 store-bought  granola pie crust, I used and recommend Heartland brand
1 gallon, Strawberry Cheesecake light ice cream, thawed a bit (obv-Turkey Hill)
1 pint strawberries, cleaned and sliced
Chocolate syrup, optional

Procedures:
1. Use a large spoon and rubber spatula to transfer the ice cream from the carton to the pie shell. Spread well
2. Place sliced strawberries on top in circular format
3. Cover will plastic top from pie crust package or foil
4. Freeze at least 8 hours or overnight
5. Slice and drizzle with chocolate syrup


Thursday, November 8, 2012

Watch Me Grow


       Great product alert: House of Pasta Frozen Pizza Dough. I probably should have blogged about this long ago as I have been faithfully using it for years now. It rarely, if ever, fails to impress me. Honestly, it turns out way better than any homemade dough I’ve ever made and is so reasonably priced, it is just a gem! You can find it in the freezer section of your grocery store, usually by the frozen pizzas and from my experience, it is also usually on the bottom shelf!
            All I do is either 1)- oil it and bowl, cover and let defrost in fridge overnight then let finish defrosting on counter for about 4 hours or 2)- oil it and bowl, cover and let defrost at room temperature all day and viola- it grows and grows and amazes me! It is like an edible science project!
            So I must apologize for the delay of this post, although some of you who know me on a day-2-day basis already have been let in on this fantabulous find. Anywho, now we all know where to find the next best thing to happen to your cooking since nonstick pans! J Enjoy….
 

House of Pasta Frozen Pizza Dough, 32 ounce

Servings: 2 frozen doughs 

Procedures:
1. Take out one dough, place in large bowl
2. Lightly oil dough and sides and bottom of bowl
3. Cover bowl with plastic wrap, let defrost in refrigerator overnight then take out and let fully defrost and rise/poof at room temperature for at least 4 hours OR let defrost at room temperature all day: 6-8 hours (FYI-placing dough in warm spot(window with sunlight, under light, etc.) speeds up this process)
4. Once it has risen, punch down and roll out on a floured surface
5. Top as you like and bake on preheated pizza stone, enjoy!

****If still not poofing up after 4 or more hours at room temp., it may be too cold in your kitchen. All I can say is it will need more time- it will poof eventually. If not, it could be a bad batch maybe. In that case, uumm….order a pie! ****
 
****To see what package looks like, click here. I couldn't find their website and this was the only image I could find. ****


Thursday, August 30, 2012

Chocolaty White Chip Macadamia Nut Cookies


             So clearly this week has been quite hectic as I’m writing this post the day I am planning on publishing it! I don’t know about other bloggers but to me this is cutting it a tad close! And to be honest, I had no idea what I was going to bring you faithful followers two days ago! Luckily, I had two things I wanted to accomplish this week that would help me get some blog-inspiration: One of my besties got engaged and I wanted to try a new product….

                1- Kristen, one of my BFFs, got engaged this past weekend and I couldn’t be happier for her and John. So what do people like me do for celebrations?? Bake, of course! 2-I recently spotted a new item in the baking aisle that I wanted to give a whirl. I love to bake things from scratch and all but sometimes time is just not working on my side! Enter, cookie mixes and random candies left in the fridge to use up!

                So I combined those two happenings and wound up with some dynamite cookies! Buttery, chocolaty and a bit crunchy is how I would describe them but really all you need to know is that they are delicious, quick, and pretty inexpensive. J Needless to say, the ready-to-wed couple happily received them and one more positive: I even was able to save a few for me and Hubby to snack on! Rock on! (No pun intended, hehe)


Chocolaty White Chip Macadamia Nut Cookies
Makes: 28 cookies

OBJ: TCW be able to make cookies with little time to spare

Ingredients:
1 package (14 oz) White Chip Macadamia Nut Cookie Mix (Betty Crocker ®)
1/3 C unsalted butter, softened
1 egg
½ C (heaping) plain M & M’s chopped
¼ C chopped milk chocolate pieces


Procedures:
1. Preheat oven to 375 degrees
2. Stir cookie mix, butter and egg together until soft dough forms
3. Add M & M’s and chocolate pieces, stir to combine
4. Drop by rounded tablespoonfuls 2 inches apart onto an ungreased cookie sheet
5. Bake for 13 minutes, rotating cookie sheets ½ way through baking, until light golden brown
6. Let cool on cookie sheet for 1 minute, then remove to rack to cool completely

 
Surprise!!! She had no idea we were waiting for her :)
 
The happy couple:)

Thursday, August 2, 2012

Meatball Parm Subs


               So I am adding a new section to my blog: What I Am Buying Up. What you can expect to find here will be items that I find helpful in the kitchen or new products I want to try out. I already have featured some items on the site so I will add them to this section ASAP.
                The item I am highlighting today is Mama Lucia Frozen Meatballs. I know what you are thinking….Make your own meatballs, girl! Or maybe….. Didn’t your Momma teach you how to make meatballs?  And my response is….Yes, I will make my own meatballs the way I was taught, when I have time! And time, well, I just don’t have that much of it lately. I don’t know where it all goes but when I figure that out I’ll let you know. J
                And so yes, I used and will continue to use frozen meatballs during these hectic times. And when I am left with a few hours to chill at home or a rainy day keeps me indoors, I’ll buy some chop meat and roll my own meatballs. However in the meantime, I’ll use these and enjoy the lack of clean-up, hours of simmering, and skimming the grease! And I hope you too, give yourself a break and use these. They are really very good and with either your own sauce (I always have some frozen) or a jarred one jazzed up with some fresh herbs, they will be sure to please. Enjoy…..

Meatball Parm Subs
Servings: 2

OBJ: TCW be able to save time and energy by purchasing meatballs rather than making them

Ingredients:
8 meatballs, frozen (from a 25.6 ounce bag-Mama Lucia Fully Cooked Italian Style Meatballs)
1 Cup marinara sauce (homemade or store bought)
1 C shredded mozzarella cheese
5-6 fresh basil leaves, chopped
2, 6 inch sub rolls, cut open like a sub except DON’T go all the way through, only ¾ way
Fresh grated Parmesan cheese
S & P: Salt and Pepper

Procedures:
1. Preheat oven to 425 degrees
2. In a sauce pan, heat marinara and prepare meatballs according to stovetop heating instructions
3. In a medium size casserole dish, arrange rolls so that they are snug and openings are faced up
4. Place and spread about ¼ C mozzarella on bottom of each roll. Cut meatballs in half and spoon about 4 meatballs (8 halves) onto each sub, spoon extra sauce over meatballs
5. Sprinkle remaining cheese over each sub so that the meatballs and sauce are almost covered:


6. Sprinkle Parmesan, basil and S & P over each and place on middle shelf of oven
7. Bake for about 10-15 minutes or until edges of bread are starting to toast, cheese is bubbling and beginning to brown
8. Remove from oven and use tongs to place on plates